
Rich, dense, chocolatey squares that prove the old-fashioned way still works best.
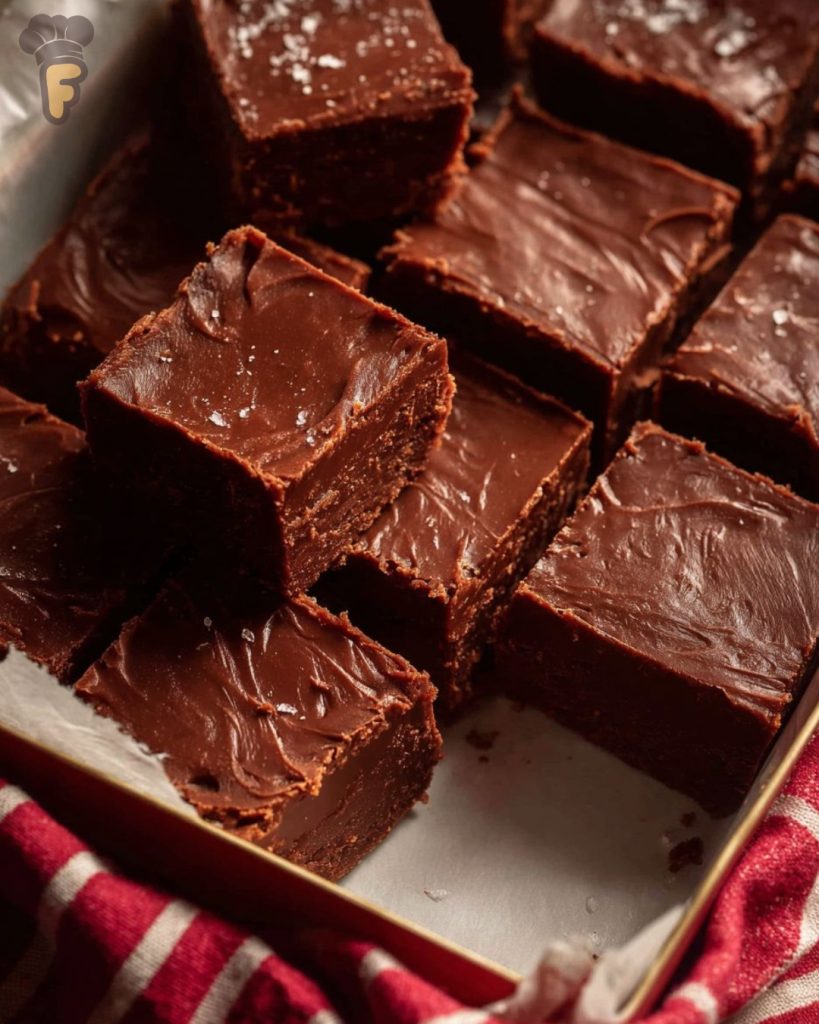
Old-Fashioned Chocolate Fudge is the kind of candy that feels simple and special at the same time. It is rich, firm, deeply chocolatey, and made with basic ingredients like sugar, cocoa powder, whole milk, butter, vanilla, and salt.
This classic fudge does not rely on marshmallow cream, chocolate chips, or shortcuts. The good news is, once you understand the soft-ball stage and the beating step, the recipe becomes much less intimidating.
What Makes Old-Fashioned Chocolate Fudge So Good?
Old-Fashioned Chocolate Fudge has a very different texture from quick microwave fudge or condensed milk fudge. It is dense, creamy, and slightly firm, with that classic candy-shop bite. It should hold its shape when cut, but still melt smoothly on the tongue.
The deep chocolate flavor comes from cocoa powder. Since there are no chocolate chips here, the cocoa really gets to shine. The sugar and milk cook together into a candy base, while the cocoa adds that bold, bittersweet chocolate flavor that keeps the fudge from tasting flat.
Here’s the thing: this recipe is all about timing and texture. Cooking the mixture to the soft-ball stage gives the fudge its structure. That means the sugar syrup has reached the right temperature to set once cooled and beaten. It sounds fancy, but it simply means the mixture is hot enough to form a soft ball when dropped into cold water.
The resting step matters too. After cooking, the butter and vanilla are added, but the mixture sits for a few minutes before beating. This helps the fudge cool slightly, which makes it easier to beat into that thick, creamy texture. Stir too early or beat too late, and the texture can change.
Beating is where the magic happens. At first, the fudge looks glossy and loose. As you beat, it thickens and loses its shine. That is your signal. Once it turns thicker, duller, and starts holding its shape, it is ready to spread into the pan. Don’t walk away here, because fudge can go from perfect to too firm very quickly (rude, but true).
This is also why old-fashioned fudge feels so satisfying. It asks for a little attention, but not complicated ingredients. Just sugar, cocoa, milk, butter, vanilla, and salt, treated the right way.
What Ingredients Do You Need for Old-Fashioned Chocolate Fudge?
- 2 cups sugar
- ½ cup cocoa powder
- 1 cup whole milk
- ¼ cup butter
- 1 tsp vanilla
- ⅛ tsp salt
Cocoa powder: Use unsweetened cocoa powder. It gives the fudge its deep chocolate flavor.
Whole milk: Whole milk gives the fudge a richer texture than lower-fat milk.
Butter: Add it after the mixture comes off the heat. This helps create a smoother finish.
Vanilla: Add it with the butter for warm flavor that rounds out the chocolate.
Salt: A tiny amount makes the chocolate taste deeper and keeps the fudge from being overly sweet.
That’s it!
How Do You Make Old-Fashioned Chocolate Fudge?
Start by preparing the pan before you cook anything. Butter a small pan, usually an 8-inch square pan works well, or line it with parchment and butter the parchment lightly. Fudge sets quickly once it is beaten, so you do not want to be searching for a pan at the last second.
In a heavy saucepan, combine the sugar, cocoa powder, whole milk, and salt. Stir until the cocoa is moistened and the mixture looks mostly smooth. A heavy-bottomed pan is helpful because it heats more evenly and lowers the chance of scorching.
Place the saucepan over medium heat and bring the mixture to a boil, stirring as it heats. Make sure to scrape the bottom and corners of the pan so the sugar and cocoa do not stick. Once the mixture reaches a full boil, keep it cooking until it reaches the soft-ball stage, about 234°F to 236°F.
A candy thermometer is the easiest way to know when the fudge is ready. Clip it to the side of the pan, making sure the tip sits in the mixture but does not touch the bottom. If it touches the pan, the reading can be too hot and throw off the timing.
If you do not have a thermometer, use the cold water test. Drop a small spoonful of the hot mixture into a cup of cold water. If it forms a soft ball that flattens when pressed between your fingers, it is ready. If it dissolves into the water, it needs more time. If it forms a hard ball, it has gone too far.
Once the fudge reaches the right temperature, remove the pan from the heat. Add the butter and vanilla, but do not stir yet. Let the mixture rest for about 5 minutes. This pause helps the temperature come down slightly and gives the fudge a better chance of becoming smooth instead of grainy.
After the rest, start beating the fudge with a wooden spoon or sturdy spatula. At first, it will look shiny and loose. Keep beating. The mixture will slowly thicken, become heavier, and lose its glossy shine. That dull, thick look is what you want.
Here’s the important part: stop beating as soon as the fudge is thick and no longer glossy. If you beat too long, it can set in the saucepan before you spread it. Trust me, you want it in the pan while it is still spreadable.
Quickly spread the fudge into the prepared buttered pan. Smooth the top as best you can, but don’t fuss over it too much. Old-fashioned fudge is allowed to look a little rustic. Let it cool completely at room temperature until firm.
Once set, cut the fudge into small squares. This is rich candy, so smaller pieces are usually better. Serve it on a dessert tray, tuck it into holiday tins, or keep a few squares nearby for a chocolate craving that needs something serious.
What Variations Can I Make?
For a nutty version, fold in chopped walnuts or pecans just before spreading the fudge into the pan. Add them after beating, when the fudge has thickened but is still soft enough to stir. Nuts give the fudge a nice crunch against the dense chocolate.
For a salted finish, sprinkle a tiny pinch of flaky salt over the top before the fudge fully sets. It makes the chocolate taste deeper and gives each square a little sparkle of flavor. Go light here, because the recipe already includes salt.
For a stronger chocolate flavor, use a darker unsweetened cocoa powder. This gives the fudge a bolder taste and a deeper color. Just know that darker cocoa can make the fudge taste slightly less sweet.
For a peppermint version, replace part of the vanilla with a small amount of peppermint extract. Use a light hand, because peppermint can take over quickly. A little goes a long way.
How to Store Old-Fashioned Chocolate Fudge?
Store Old-Fashioned Chocolate Fudge in an airtight container at room temperature for about 1 week. Keep the pieces separated with parchment or wax paper if stacking them.
For longer storage, refrigerate it for up to 2 weeks. Let the fudge sit at room temperature for a few minutes before serving so the texture softens slightly.
You can also freeze fudge. Wrap it tightly, place it in a freezer-safe container, and freeze for up to 2 months. Thaw in the refrigerator, then bring to room temperature before serving.
Frequently Asked Questions
What is soft-ball stage for chocolate fudge?
Soft-ball stage is when the fudge mixture reaches 234°F to 236°F. At this point, a small drop of the mixture forms a soft ball in cold water that flattens when pressed.
Why did my old-fashioned fudge turn grainy?
Grainy fudge usually happens when sugar crystals form too early or the mixture is stirred at the wrong time. Let the fudge rest after cooking, then beat it only until it thickens and loses its shine.
Can I make Old-Fashioned Chocolate Fudge without a candy thermometer?
Yes, but a thermometer makes it easier. Use the cold water test by dropping a little hot mixture into cold water and checking if it forms a soft ball.
Why didn’t my fudge set?
The mixture may not have cooked long enough to reach soft-ball stage. If it stays too soft, it likely needed a little more time on the stove.
How do I know when to stop beating fudge?
Stop when the fudge becomes thick and loses its glossy look. It should still be spreadable, but it will feel heavier and start holding its shape.